Connect Google Sheets to Citypicked
If you keep your customers in a Google Sheet, a review request goes out by itself for every new row. The connection runs through Zapier: Zapier sends the name and mobile number (or email) from the new row to your automation link.
- Step 1:
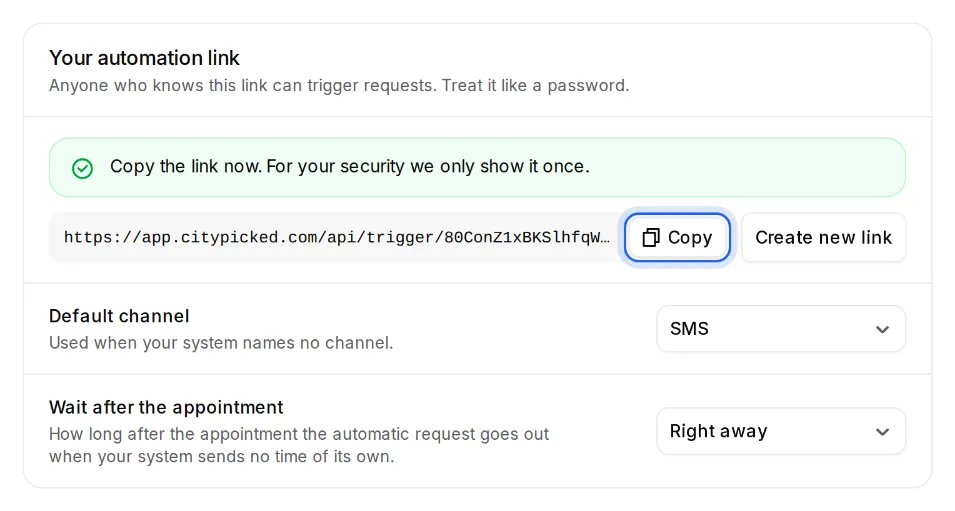
In Citypicked, open Settings, Sending, “Automatic after every appointment” and click “Set up”. Create your automation link there and copy it right away: Citypicked shows it only once.
- Step 2:
Give your sheet columns for name and mobile number (or email), with the headings in the first row.
- Step 3:
Create a new Zap in Zapier. Trigger: Google Sheets with the event “New Spreadsheet Row”, so a new row. Pick your spreadsheet and the sheet.
- Step 4:
Add the action “Webhooks by Zapier” with the event “POST”. Paste your automation link into “URL” and set “Payload Type” to “json”.
- Step 5:
Under “Data”, add these rows: name with the column for the name and phone with the column for the mobile number (or email with the column for the email).
- Step 6:
Add a test row with your own number and switch the Zap on. Under “Recently received” Citypicked shows everything your system sent, with its result, so you see right away whether everything arrives.